Related: Best Squat Rack for a Garage Gym: Steel, Welds, and What Holds
A home gym power rack setup is not a shopping list. It is an order of operations. Get the order wrong and you end up with a cheap rack bolted to a slab, a bar with no plates, and puzzle mats sliding out from under your feet at the worst possible moment. Get it right and you have one corner of a garage that outlives every other piece of equipment you own.
I have been lifting in a garage in Charlotte for years, and I spent four years as a welder's apprentice before I moved into industrial maintenance, which is why I read welds the way other people read spec sheets. I keep a grease-pencil logbook of every rack I have loaded: tube gauge, weld penetration, bolt torque, and the exact weight where the wobble starts. A rack that wobbles at 315 will kill you at 405. There is no negotiation in that sentence.
That is the lens for this setup. Four pieces, ranked by what actually matters: the rack that has to catch a missed rep, the combo unit that trades a little ceiling for a lot of function, the bar and plates that load the rack, and the floor that keeps the whole thing from walking across the slab.
The Rack That Does The Most Jobs: ULTRA FUEGO Power Cage
This is the piece I would buy first, and the reason is simple. A power cage is the only thing in a home gym that has a second job: it holds the bar up while you work, and it catches the bar when you fail. Everything else you buy, a bench, a bar, plates, flooring, is equipment. The cage is the safety system.
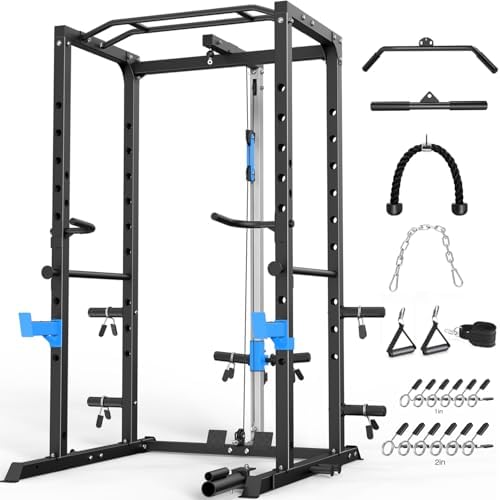
What I like about the shape of this one is that it is multi-functional without being a gimmick. J-hooks hold the bar on the uprights. Dip handles turn the frame into a dip station so you are not buying a separate stand that lives in the corner. The landmine attachment opens up rowing, pressing, and rotational work off one anchor point. The optional cable pulley system is the part that decides whether this replaces a lat pulldown or just adds a note to your wish list.
Before I would load it, I would do what I do with any cage. Run a straight edge along the base and see if it rocks. Look at the weld at the base of each upright, not the bead, the toe of the weld, where it fuses into the tube. Check the bolt kit. If a rack ships with hardware-store bolts instead of grade-8, that tells you what the rest of the decisions looked like.
Reader note: those bolts are the first thing I swap. Fifteen minutes and a few dollars, and it is the cheapest insurance policy in the garage.
The Combo Route: YOLEO Smith Machine & Squat Rack Combo
The Smith machine and squat rack combo is the answer for a specific lifter: the one training alone, in a garage, at 6 a.m., with no spotter and no interest in asking a neighbor to come watch him bench. A guided bar path lets you press to failure and rack the bar on a hook you can reach from flat on your back. That is a real safety feature and it is worth being honest about.
The trade is real too. A guided bar means the bar goes where the rails say, which is not always where your joints want it. The frame is bigger than a plain cage, so it eats floor space and it eats ceiling height. And rails have play. A guided bar with slop feels awful on a heavy bench, and it gets worse as the rail wears.
So my checklist for a combo unit is short and unforgiving. Grab the bar and shake it side to side. If the rails knock, that is your answer. Look at the lockout hooks and see how they are attached, welded or bolted, and whether the catch is deep enough to grab a bar that comes in crooked. Then measure, twice, before you buy.
If you squat alone and you have never failed a rep in a rack without safeties, this is the unit that changes your training. If you lift with a partner or you already own a cage, it is a convenience, not a necessity.
The Load: CAP Barbell Starter Olympic Weight Set
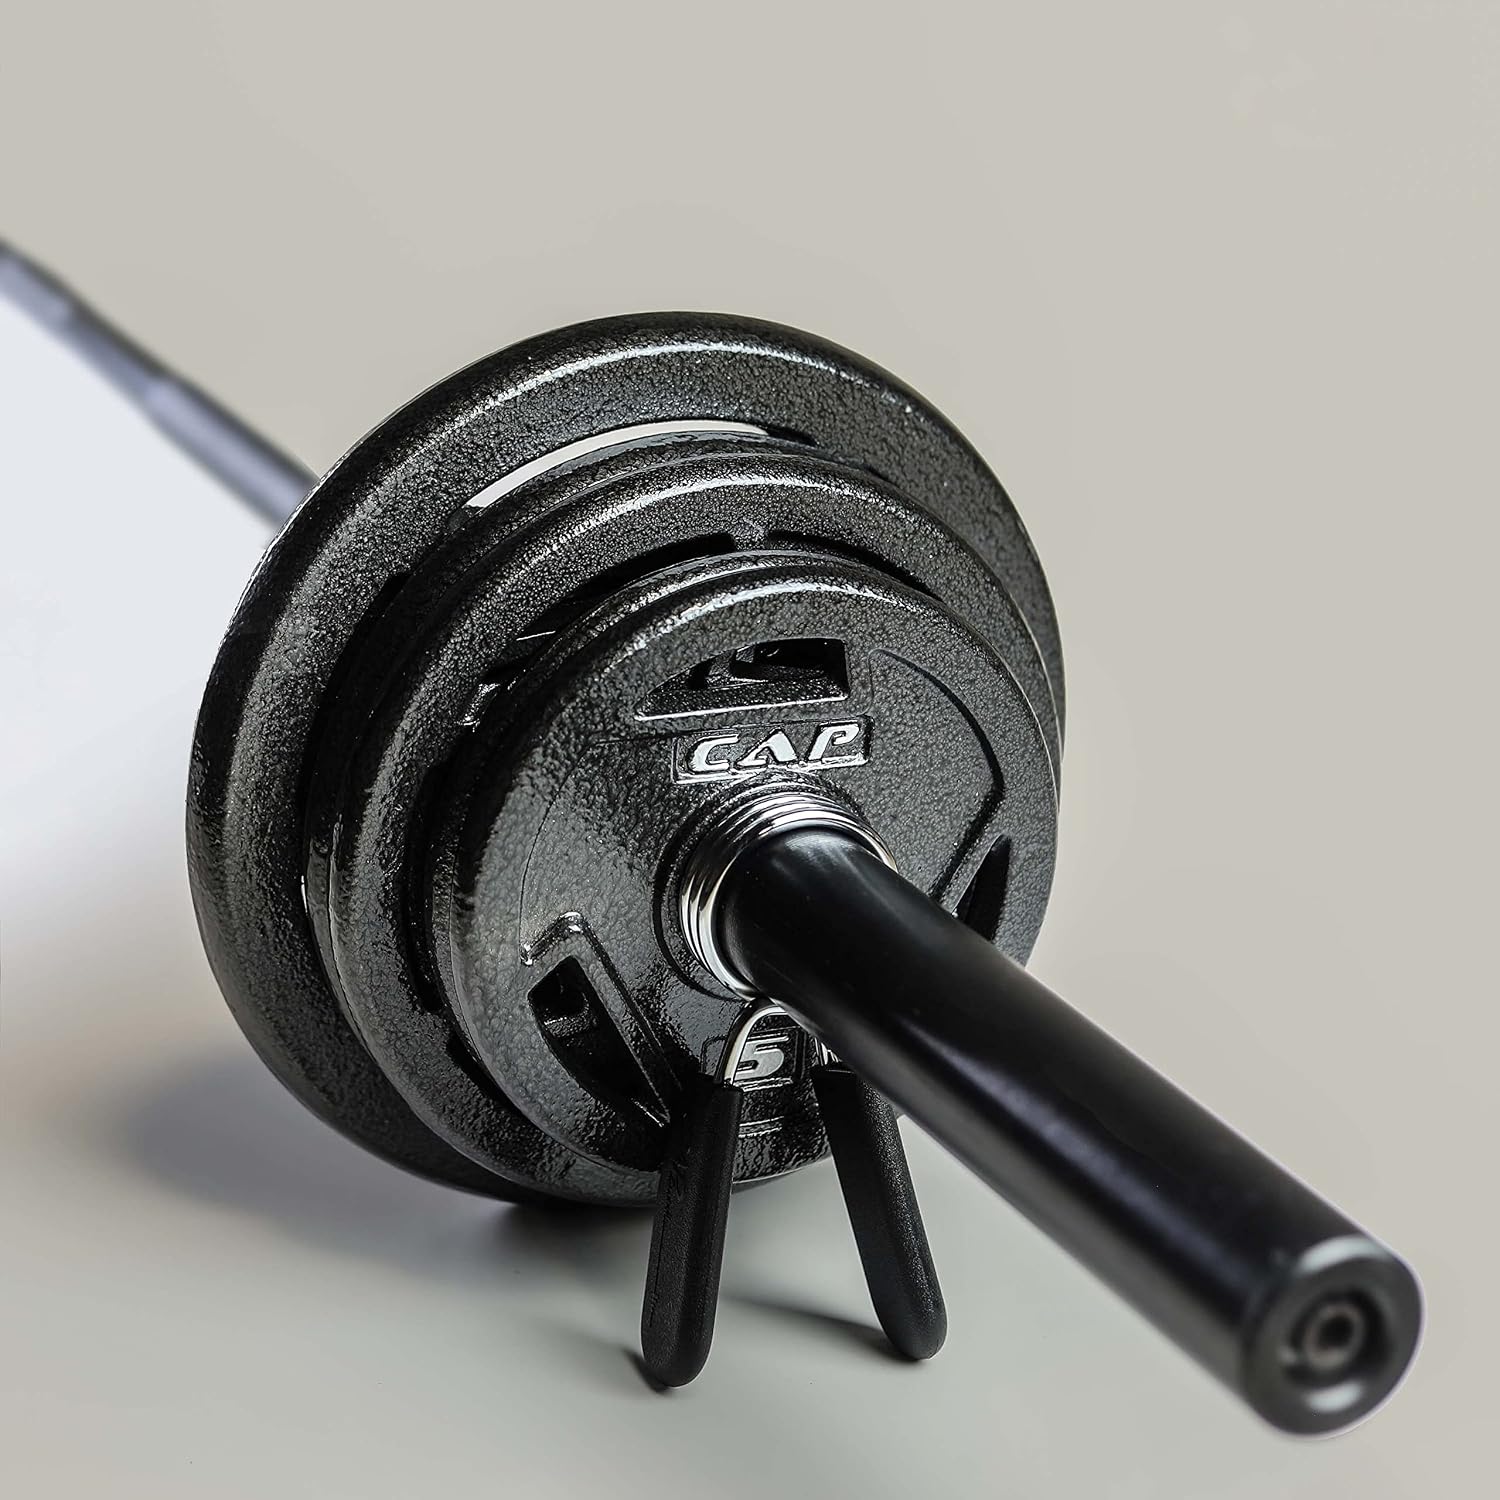
A rack with no bar is a sculpture. The starter Olympic weight set is the piece that turns the frame into a gym, and the reason I put it third instead of second is that it is the easiest piece to upgrade later. Plates are plates. A bar is not.
The listing runs multiple options, and the option you pick matters more than the name on the box. Read it carefully. Does the option include a full-length Olympic bar or a shorter one. What plates come with it, and how many of each. Whether collars are included. Those three questions decide whether you can start squatting the day it arrives or whether you are ordering a second shipment.
Two things I check on any starter set. First, sleeve diameter, because Olympic plates need a two-inch sleeve and a bar that measures under that will let plates walk. Second, the knurl. A bar with shallow knurl and no center knurl will slide on your back the first time you get past a warmup squat. If the option you can afford has those, buy it, train on it, and put the money you save toward a better bar in a year. That is not settling. That is sequencing.
The Floor: VEVOR Interlocking Gym Mats
Flooring is the piece everyone skips and everyone regrets. Twelve tiles at 25 by 25 inches gets you 48 square feet, which is enough for a rack footprint plus a platform area for deadlifts and rows, and 0.56 inch of thickness is the difference between standing on concrete and standing on something that does not punish your knees on every rep.
The construction here is a rubber top over a high-density EVA foam core, and that combination is a compromise worth understanding before you buy. The rubber top takes the scuffs, the chalk, and the dropped-plate abuse. The foam core gives you cushion and quiet, and it protects the slab from the kind of dents that turn into cracks over a Charlotte summer. What a foam core is not is solid rubber. If you are dropping heavy deadlifts from the top every single session, plan your platform area accordingly and be honest about what a 0.56-inch tile can absorb.
The interlocking edges are the part that matters most for safety. Puzzle tiles that do not lock tight will separate under a rack foot, and a rack foot sitting on a spreading seam is a wobble you built yourself. Lay the tiles on a clean, flat slab, tap the seams together with a rubber mallet, and give the floor a day to settle before you load it.
How I check a rack before I load it
Every rack I have ever loaded got the same inspection, and it takes about twenty minutes.
- Steel gauge. The sticker is a claim, calipers are a fact. Measure the upright wall thickness if you can, and look up what the number means before you accept a capacity claim. Thin tube flexes, and flex is what you feel at the top of a squat.
- Weld penetration. Look at where the weld meets the base metal. A pretty bead with no penetration is a lie wearing a tuxedo. If the weld has been ground flat to hide the joint, ask yourself why.
- Hardware. Grade-8 bolts or better, or budget for a trip to the hardware store. Loose hardware is the most common source of wobble in a bolt-together rack, and it is the cheapest thing to fix.
- Base design. Flat-foot racks sit on the floor and rely on weight and geometry. Bolt-down racks are more stable but they put holes in your slab. Either is fine. What is not fine is bolting a lightweight rack to the floor to make up for steel it does not have.
- J-hooks. Grab one and try to tip it. Cheap hooks bend and tip when you re-rack crooked, which is exactly when you are tired and exactly when it matters.
- Safety arms. Compare the rating against your working weight, not the bar weight you tell people about. If the arms are rated below your squat, they are decoration.
What the specs actually tell you
A capacity sticker is a legal document, not a fact. When a rack advertises a four-digit number and the tube is thin, the number was written by a marketing department and blessed by a lawyer. That is the single most common lie in home gym equipment, and it is the one that hurts.
The second thing specs tell you is how the rack was designed to be used. A combo unit with a guided bar and lockout hooks is built for a solo lifter who needs to fail safely. A multi-functional cage with a landmine and a pulley option is built for variety, for someone who wants one frame to cover pressing, pulling, and accessory work instead of a rack plus three separate stations. Neither is better. They are answers to different questions, and the question you are actually answering is how you train alone at 6 a.m.
The third thing is order. Steel first, because it is the safety system. Bar and plates second, because they are the training. Flooring third or fourth, because it protects the slab and your joints, but a rack with no floor still works while you save. And nothing in this list is worth buying twice, which is why I would rather wait a month and buy the rack I actually want than buy the cheap one now and replace it after it bows.
Home gym power rack setup reference table
This is how I would rank the four pieces for a garage or spare room build, and it is the order I would spend in.
| Product | Role in the setup | What to check first | Price |
|---|---|---|---|
 Visit on Amazon → Visit on Amazon →ULTRA FUEGO Power Cage |
The safety system: squats, bench, press, dips, landmine work | Upright gauge, weld quality at the base, bolt kit, J-hook design | $299.98 |
 Visit on Amazon → Visit on Amazon →YOLEO Smith Machine & Squat Rack Combo |
Guided bar path for training alone: Smith work, benching without a spotter | Rail play, lockout hook depth, ceiling height, footprint | $169.99 |
| <img src="/images/products/B0B52LTMSR.jpg" alt="CAP Barbell Starter Olympic Weight Set | Multiple Options" width="340" style="border-radius:8px;max-width:340px;width:340px;height:auto;max-height:420px;object-fit:contain"> CAP Barbell Starter Olympic Weight Set |
The load: bar and plates that make the rack worth owning | Sleeve diameter, bar length in the option you choose, knurl, included collars |
 Visit on Amazon → Visit on Amazon →VEVOR Interlocking Gym Mats |
The floor: slab protection, standing surface, seam control | Coverage math, seam lock, thickness against your dropped-load plan | $79.11 |
A note on coverage and order
Forty-eight square feet sounds like a lot until you lay it out. A rack footprint eats a chunk of it, a deadlift platform area eats more, and you still want a strip in front of the rack to stand on. Sketch the garage on paper first, count the tiles you actually need, and buy a second box if the math is close. A gap under one rack foot is not a gap. It is the wobble you built.
On order: rack, then bar and plates, then flooring. If the budget forces a choice between flooring and a better rack, buy the rack. You can lift on concrete for a year. You cannot fix thin steel with mats.
Should you buy the ULTRA FUEGO Power Cage?
Yes, if you want one frame that covers the main lifts plus dips, landmine work, and the option to add a pulley later. The reason to buy a cage instead of a stand is the safety system, and this one is built to be that. Check current Amazon price.
Go through the same list I go through. Base welds, bolt kit, hook design, and the gap between the capacity claim and the tube you can actually see. If those check out, this is the piece you build the room around. If they do not, walk away, because the rack is the one thing in the garage that has to outlive everything else.
Should you buy the YOLEO Smith Machine & Squat Rack Combo?
Yes, if you train alone and you press or squat without a spotter. The guided bar is a safety feature before it is a training tool, and being able to rack a failed bench press without asking for help is worth more than the slight loss of free-bar feel. Check current Amazon price.
No, if you already own a rack with real safeties, or if your ceiling is low, or if you cannot shake the rails in the store and get a solid answer. Measure twice. A combo unit with rail slop and no headroom is a machine you will stop using, and a machine you stop using is the most expensive thing in the garage.