A squat rack setup is not a furniture assembly job. It is a structural install in a building you also live in, and the difference between a rack that holds and a rack that wobbles shows up at exactly the wrong moment, which is the rep you cannot finish.
I have put together, loaded, and deliberately abused nine racks in the last six years in a garage in Charlotte, and I have a grease-pencil logbook for every one of them: tube gauge, weld penetration, bolt torque, and the exact weight where the wobble starts. Two of those racks are the ones below. The rest taught me what to check before I spend a Saturday on my knees with a wrench.
This is the order I actually do it in. Spot first, slab second, hardware third, steel last.
Why you should trust me
I spent four years as a welder's apprentice before I moved into industrial maintenance, which means I read welds the way other people read spec sheets. A pretty bead with no penetration is a lie wearing a tuxedo. I squat raw in my garage three nights a week, I have failed a rep at 495, and the safety bars are the only reason I am writing this instead of rehabbing a neck.
My rules are not negotiable. No rack gets recommended without a loaded stability check at or above the weight it claims to hold. No capacity sticker gets repeated without me checking it against the actual tube gauge. And no rack gets bolted down as a fix for being cheap. If you have to anchor a $200 rack to keep it still, you bought the wrong rack.
What a squat rack setup actually requires
Most people fail at this step, not at the wrench step. Before you buy anything, answer four questions.
How tall is your ceiling? Measure from the slab, not from the drywall. A full cage with a pull-up bar needs real headroom, and a lat pull down attachment on a cage adds more. If you have a low garage, a stand-style rack is the honest answer.
How thick is your slab? Garage slabs are usually four inches, which is enough for a wedge anchor if you drill correctly. A thin patio slab or a wood-framed floor over a crawlspace is a different conversation, and in that case you want a flat-foot rack that does not need anchors at all.
Where are your studs? If you are considering anything wall-mounted, this is the whole ballgame. Miss the stud and you are hanging your face from drywall. I have seen a wall-mount pull its top bolts clean out of a stud because the installer caught the edge instead of the center.
How heavy do you actually lift? A rack rated for 1,000 lb does not make your 225 lb squat safer in any way you can measure. What matters is whether the frame stays put when you rack a heavy bar off balance, which is the load case that tips racks over.
Tools and parts to have on the bench before you start
You need a tape measure, a 4-foot level, a dead blow mallet, a socket set that matches your hardware, a torque wrench, and a marker. That is the whole list.
Two things people forget. First, a magnetic tray or a muffin tin for the bolts, because a cage ships with a lot of them and they all look alike until they don't. Second, your own grade-8 hardware if the rack ships with hardware-store bolts. That is one of my standing complaints. A rack is only as strong as the bolts tying it together, and soft bolts stretch.
If you are anchoring, add a hammer drill, the correct carbide bit for your anchor diameter, a shop vac, and wedge anchors sized for your slab. Do not use plastic plugs in a garage floor.
The racks I would start with
Both of the racks below are cage-or-stand designs that solve the same problem in different footprints. One is a full cage with a cable system. One is a compact adjustable stand.
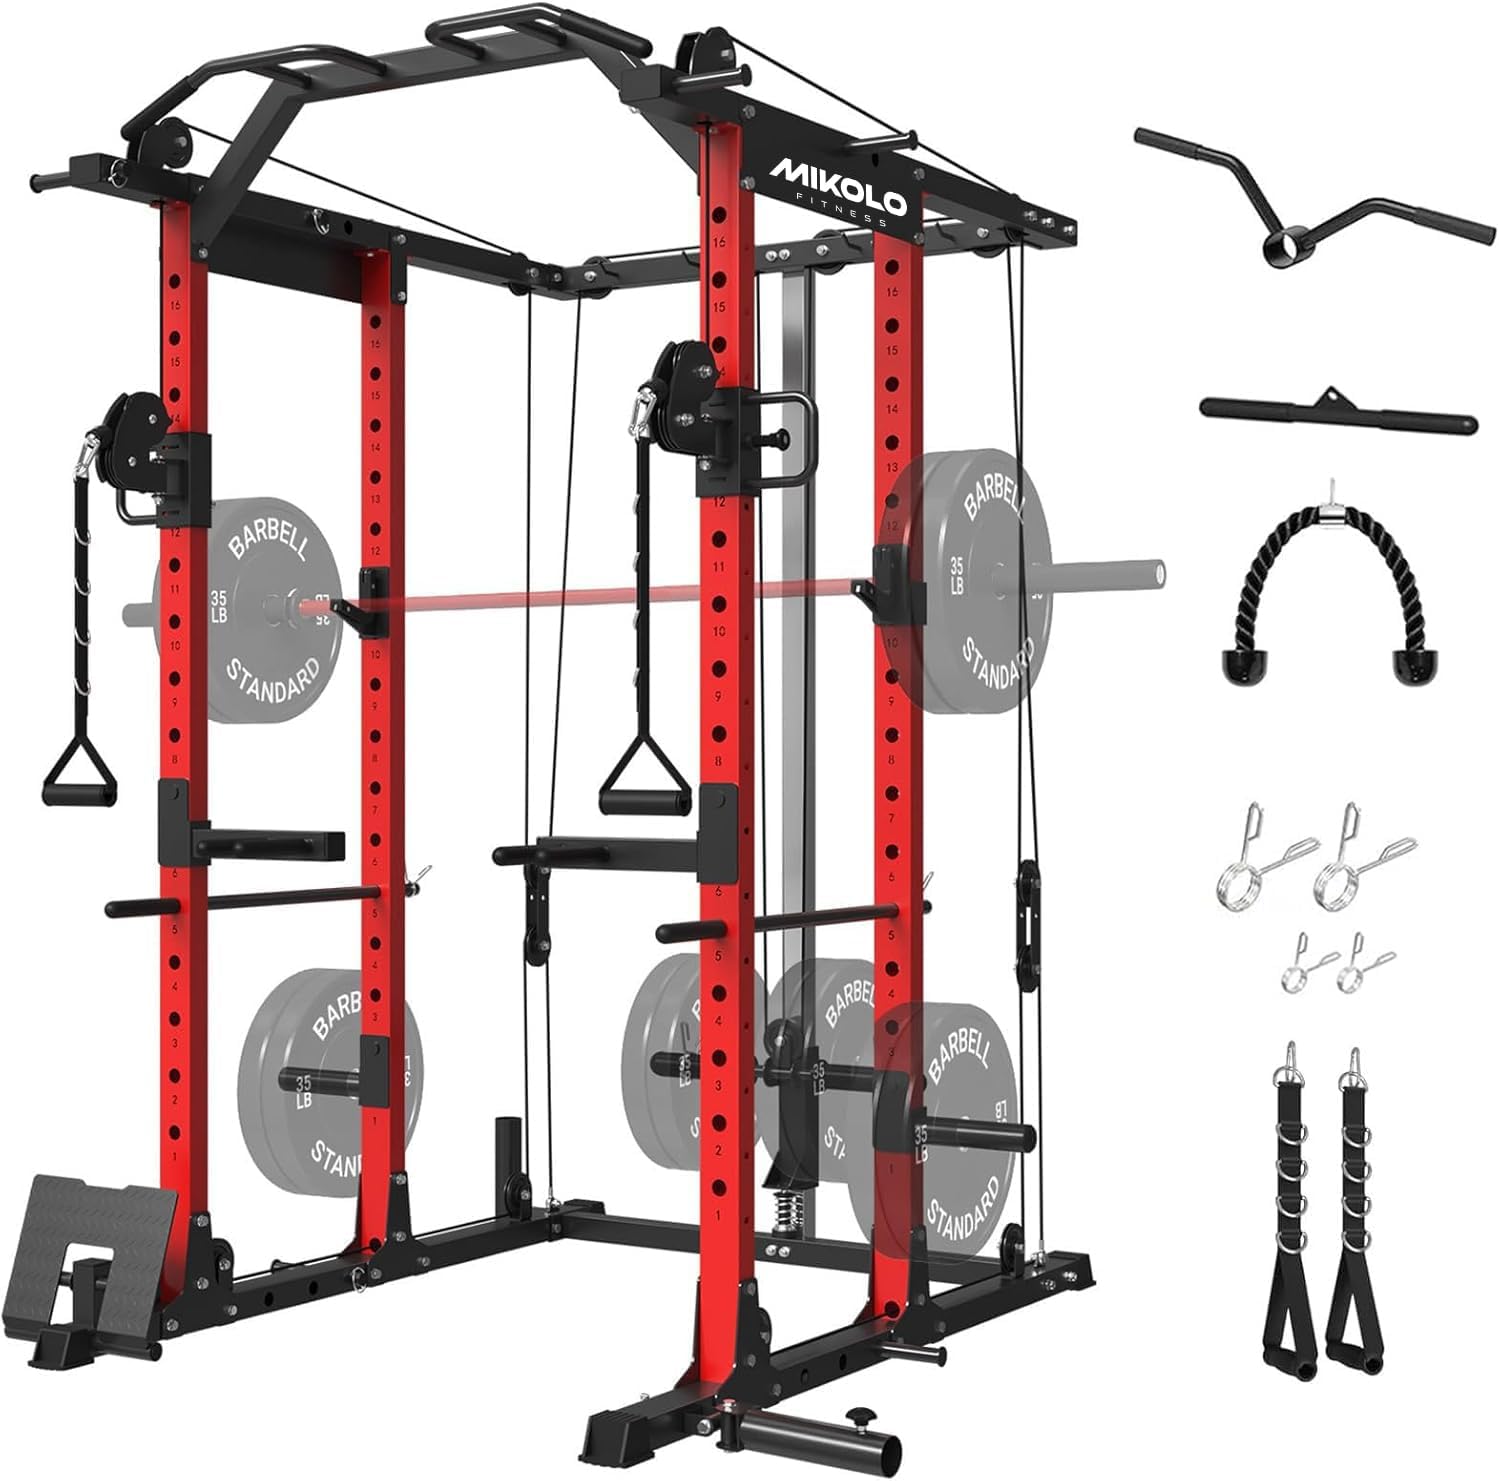
The full-cage pick: Mikolo Power Cage, Power Rack with Cable Crossover System, 1500LBS Squat Rack with LAT Pull Down System, Workout Cage with Pulley System for Fitness Home Gym
 Visit on Amazon →
This is the one I would point a lifter at if they want one purchase to cover squatting, benching, and pulling. It is a full cage, so the safeties are built into the frame instead of being an accessory you hope lines up, and it carries a cable crossover and lat pull down system, which is the part that turns a rack into a whole training station.
Here is what that means for your Saturday. A cage with a pulley system has more parts than a bare rack, and every extra part is another bolt to torque and another moving piece to check. Budget two people and a full afternoon, not ninety minutes. Sort the hardware by length before you touch an upright.
The capacity number on the listing is a claim, not a test result. My rule is the same one I apply to every rack: put a level on the frame, load it progressively, and watch the uprights and the base for movement. If it walks, it gets anchored. A cage this size has a wide enough base that a flat-foot setup is realistic on a solid slab, but I would still have anchors on hand.
Flaws but not dealbreakers: Pulley systems add cable stretch and friction points over time, so plan on checking cable tension and greasing the guide rods. That is maintenance, not a defect.
Anyone with the ceiling height and the floor space who wants one frame to do squats, bench, and lat work should look here first.
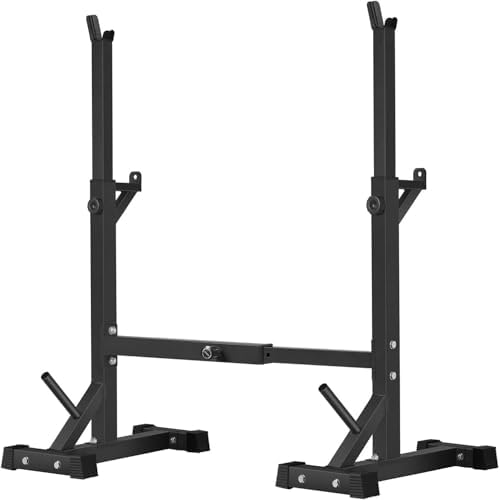
The compact-stand pick: BangTong&Li Squat Rack Stand,Barbell Rack,Bench Press Rack Stand Home Gym Adjustable Weight Rack 550Lbs
 Visit on Amazon →
This is the stand-style answer for a garage or spare room where a full cage will not fit, or where the ceiling is too low for a cage with a pull-up bar. It is adjustable, it holds a barbell for squats and bench press, and it takes up a fraction of the floor a cage does.
A stand has one structural weakness a cage does not, and it is not the steel. It is what happens behind you. There is no frame around you, so the safeties have to come from the stand itself. Before you buy any stand, confirm what catches a failed rep. If there is nothing rated to catch your working weight, then your squat weight is limited by what you can dump safely, and that is a training problem, not a gear problem.
Setup is faster than a cage because there is less frame to square, but the leveling matters more. Two independent uprights that are not square to each other will make the bar feel like it is fighting you on every re-rack. Level each side, measure the gap top and bottom, and match them before you tighten anything down.
Flaws but not dealbreakers: The 550 lb figure is the ceiling on the listing. Treat it as a maximum, not a target, and remember that a dropped bar multiplies the load far beyond what you squat.
Anyone in a rental, a low-ceiling garage, or a small room who wants a real barbell setup without a cage footprint should start here.
The setup, step by step
Step one: pick the spot and check the slab
Put the rack where you have at least three feet in front and behind it. You need that space to load plates and to bail. Then check the slab for cracks, a slope, or a hollow sound when you tap it. A garage floor that drains toward the door is sloped, and a sloped floor means you shim or you anchor.
Step two: find your anchor points
If you are anchoring, mark the holes with the rack in place and the frame level, not with the rack pushed aside. Drill with the correct bit, vacuum the dust out of the hole, and set wedge anchors so the nut and washer sit flush. Do not over-drill deeper than the anchor needs.
If you are not anchoring, this step is a stud check for wall clearance and a flatness check for the feet. A flat-foot rack on a sloped floor will rock. Fix the floor contact before you load it.
Step three: sort the hardware
Lay every bolt, washer, and nut out in rows by length. A cage ships with a lot of hardware, and mixing a long bolt into a short hole is how people strip threads and strip patience. Count the parts against the list before you start.
Step four: build the base square
Assemble the base or the feet first, on the floor, loosely. Measure both diagonals. If the two diagonal measurements do not match, the base is not square, and every upright you add will lean. Get the diagonals equal, then snug, then torque.
Step five: uprights and crossmembers
Two people, one upright each. Set them in the base, hold them plumb with a level, and install the crossmembers finger tight. Do not torque anything yet. A rack is a system, and tightening one joint early pulls the rest out of alignment.
Step six: j-hooks and safeties
Set your j-hooks at the height you unrack from, then set the safety bars one hole below your bottom position. That is the correct setting for a squat, not the height where the bar touches the safeties at the bottom. You want the bar to travel to depth and the safeties to catch it only when you fail. Cheap j-hooks tip when you re-rack crooked, so check that yours seat flat under load.
Step seven: torque and load test
Torque every bolt to the spec in the manual, working from the base up. Then do the load test. Put a level on the frame, load the bar progressively, and watch for movement at each step. If the rack walks, hops, or the uprights bow, stop and fix it before you train in it. This is the step everyone skips, and it is the only step that matters.
Step eight: bench placement
A rack is half the setup. The bench is where people cheap out, and it is the second-most dangerous thing in the room after the rack. A bench that wobbles side to side on flat bench will wobble worse on incline. Test yours at the angle you actually press from before you trust it under a heavy set.
Mistakes I see in almost every garage setup
Bolting a cheap rack to the floor instead of buying a rack that does not need it. Skipping the diagonal measurement on the base and fighting a leaning rack forever. Setting the safety bars where they touch the bar at the bottom of a squat, which turns every rep into a scrape. Loading the rack before torquing the bolts. And trusting a capacity sticker without ever looking at the tube gauge.
None of those cost money to fix. They cost attention.
What this all costs
The cage is the bigger spend and the bigger install. The stand is the smaller spend and the faster install. Check current Amazon price on both before you decide, because the gap moves.
The math that actually matters is cost per training day. A rack you keep for ten years and squat in three times a week is around 1,500 sessions. Even at the cage end of the price range, that is a few cents a session for the one piece of equipment in your gym that has to outlive everything else you own.
The wobble test is free. Do it before you trust anything you built.
That is the job.