Most garage gyms fail at the same two points: the power rack and the adjustable bench. Everything else, the bar, the plates, the flooring, the chalk bucket, is downstream of those two decisions. Get them right and you train for fifteen years without thinking about them again. Get them wrong and you find out at 400 lb, which is the worst possible time to learn anything.
I'm Andre. I squat in a garage in Charlotte, North Carolina, three nights a week at 6 a.m. before work, and I have a raw 500 lb squat and a 605 lb deadlift. Before I moved into industrial maintenance, I spent four years as a welder's apprentice, which is why I read a weld the way other people read a spec sheet. I've assembled, loaded, and deliberately abused nine squat racks in the last six years. One bowed at 405. One wall-mount pulled its top bolts clean out of a stud while I was standing under it, and I still think about that one when I'm setting up a new rack.
This is the process I use now. It isn't glamorous. It's a tape measure, a torque wrench, a four-foot level, and a grease-pencil logbook.
Why you should trust me
Nine racks, six years, and a logbook that records four things on every single one: tube gauge measured with calipers, weld penetration at the base and crossmember joints, bolt torque at assembly and re-torque, and the exact weight where the wobble starts. That last number is the only spec on the sticker that matters, and it's the one no manufacturer prints.
I've failed reps at 495. The safety bars caught them. That's the whole job of a rack, and it's the only test I actually care about: would I trust this thing to catch a missed rep at my working weight, on a Tuesday, when I'm tired and my setup is sloppy.
Three things I believe after all of that. A rack that wobbles at 315 will hurt you at 405. There is no negotiation on that. Bolt-together is fine, wobble is not. And you're not buying steel, you're buying the welds, because a pretty bead with no penetration is a lie wearing a tuxedo.
How I picked and how I tested
This article isn't about which rack to buy. It's about how to set one up so the wobble never shows up in the first place, and the two pieces below are the ones this workflow is built around.
The protocol I run on anything that comes into my garage is the same every time. Calipers on the upright tube, because a sticker that says heavy-duty and a tube that measures 14-gauge are two different products. A visual pass on the welds where the uprights meet the base and where the crossmembers tie in, looking for undercut and cold lap. A hardware check, because grade-8 bolts and hardware-store bolts look identical in a bag until one of them stretches. A torque verification against the manufacturer's spec, in a cross pattern, twice. A level check across the base in both directions. Then a progressive load test: empty bar, half, seventy percent, eighty-five percent, working weight, watching the base for lift and the uprights for flex at each step.
For a bench, the test is narrower and meaner. Flat bench first, checking for side-to-side play with bodyweight and then loaded. Then incline, because that is the position where benches actually fail. The hinge and the pad gap are where cheap benches give themselves away, and a bench that folds in half when you drop 275 on it makes the capacity sticker a legal document, not a fact.
The rack and the bench this setup is built around
You need both, and you need to plan them together, because the bench has to live inside the rack for pressing and the rack has to be wide enough that the bench isn't pinched.
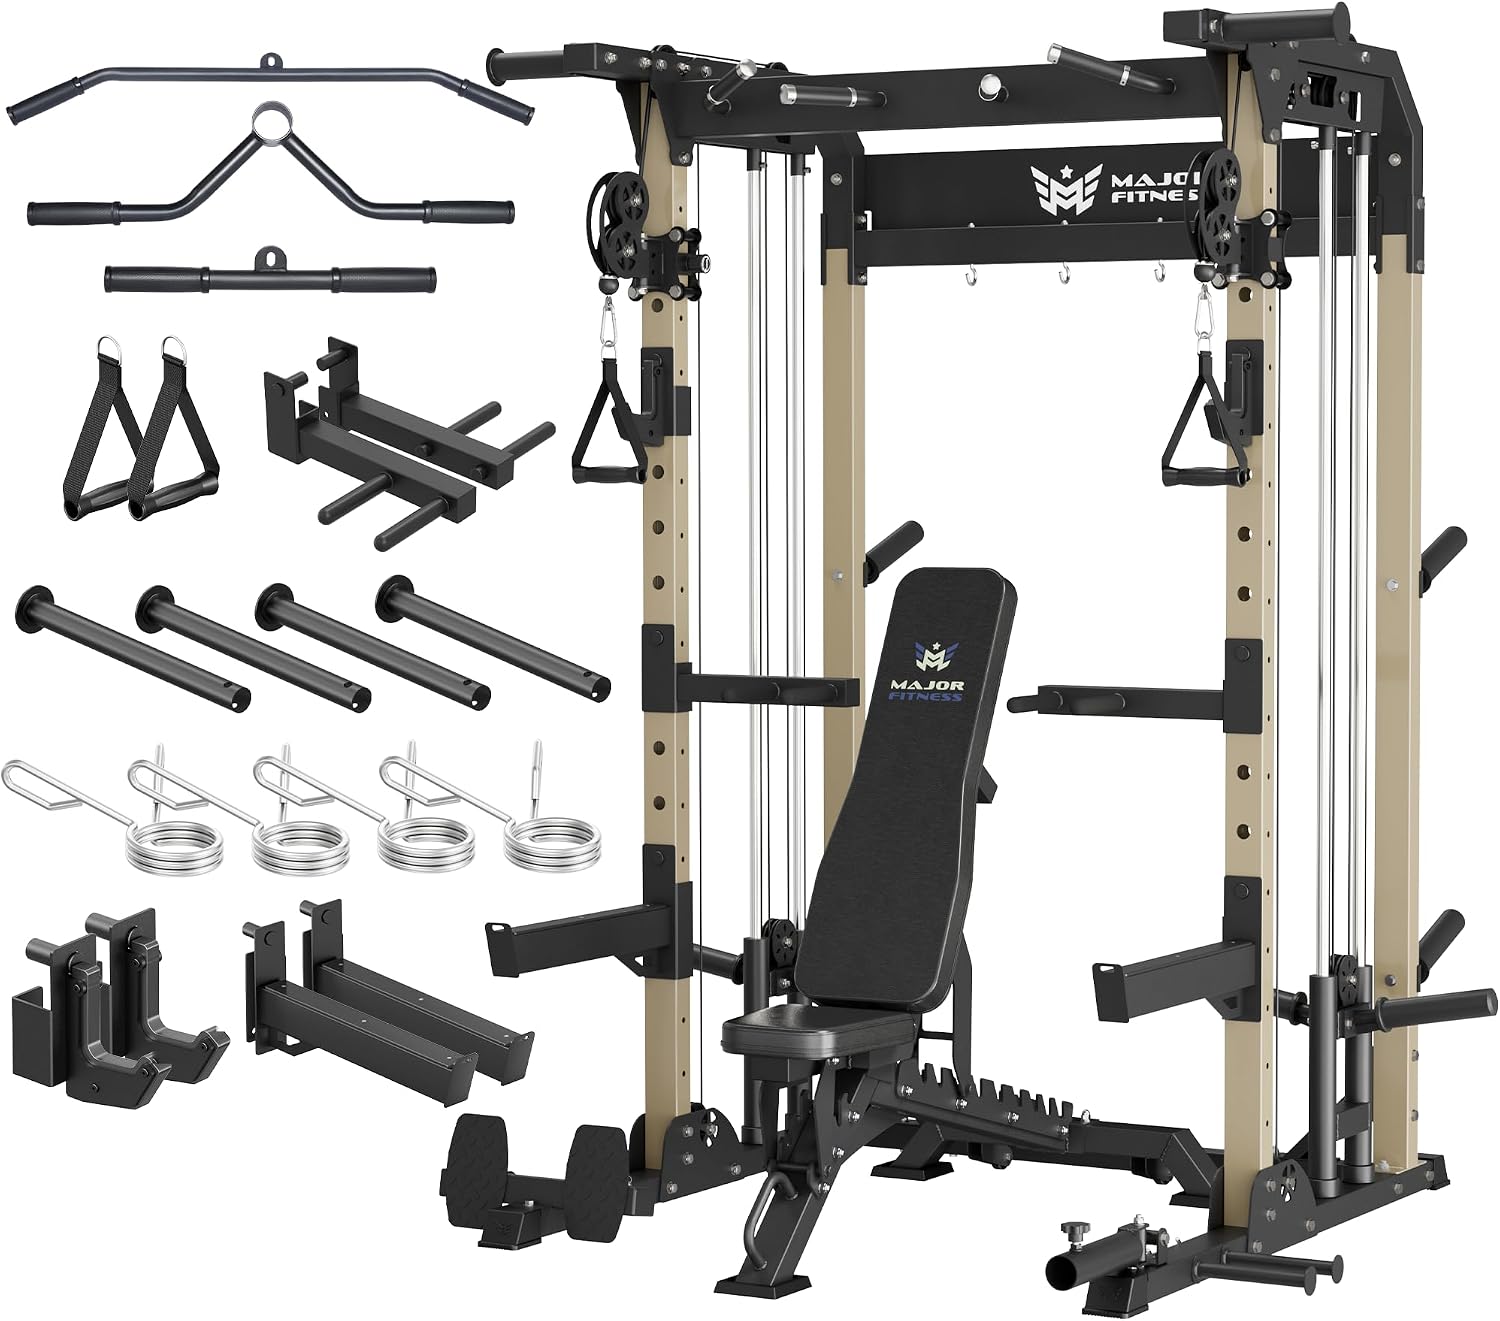
The rack: MAJOR FITNESS F22 Power Rack, 1600lbs All-in-One Squat Rack with Dual Pulley System, Heavy-Duty Steel Frame, Attachments & Storage for Home Gym Strength Training
 Visit on Amazon →
This is an all-in-one power rack with a dual pulley system, a heavy-duty steel frame, attachments, and storage built into the footprint, and the label claims 1,600 lb. What that means for your setup is that it is not just four uprights and two crossmembers. The pulley system adds a cable run, a carriage, and a weight stack or plate-loaded horn, and all of that changes your wall clearance and your cable routing. Measure the depth of the assembled unit before you pick a spot, then add enough room behind it to stand and load plates without banging your elbow into drywall.
Two things to check before you trust the rating. First, the welds at the upright-to-base junction. That is where a rack under load either holds or walks, and it is where the load path terminates. Second, the j-hooks and the spotter arms. J-hooks that tip when you re-rack crooked are a design problem, not a user problem, and if the spotter arms are rated below your squat, they're decoration. A rack rated at 1,600 lb with safety arms rated at 400 is a 400 lb rack when you're training alone, which most of us are.
The storage and attachments are the practical part of the all-in-one design. If the bar, the collars, and the attachments have a home on the rack, they aren't leaning against your car, and you aren't hunting for a collar at 6 a.m.
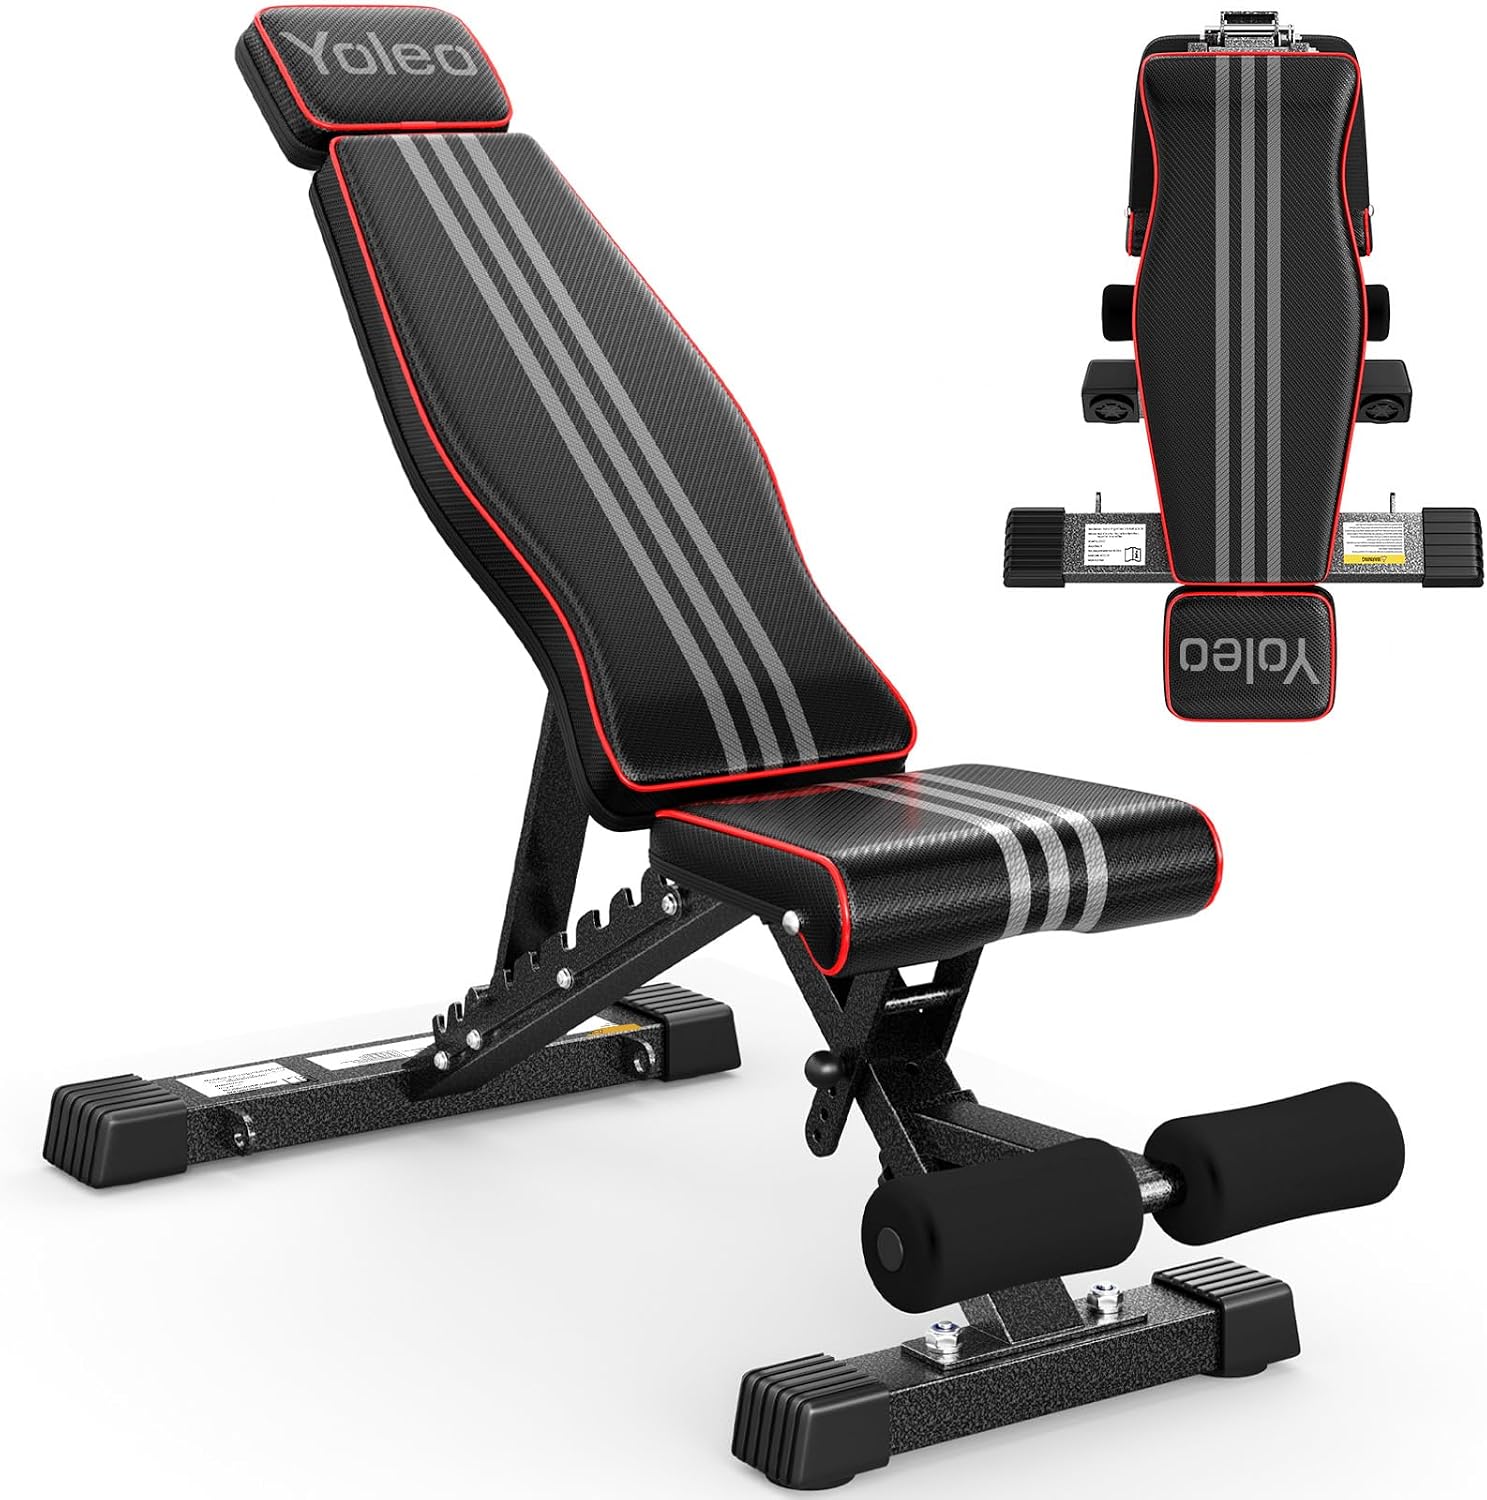
The bench: YOLEO Adjustable Weight Bench, ASTM-Certified 827LBS
 Visit on Amazon →
The bench is where people cheap out, and it is the second-most dangerous thing in the gym after the rack. This one is an adjustable bench carrying an ASTM-certified 827 lb label, and the certification is worth more than a printed number, because it means an outside body put the thing through a standard rather than a marketing department typing a figure onto a box.
Here is what I'd verify before I loaded it. Set it flat and push it side to side with your hand on the pad. Any lateral rock means the hinge or the frame tolerances are loose, and that rock gets worse under load, not better. Then check the gap between the seat pad and the back pad at your pressing angle. A gap that pinches is a bench you'll avoid using on incline, and an avoided bench is a wasted bench. Then set it on incline and watch the hinge pin under bodyweight before you ever put a plate on the bar.
If you plan to press inside the rack, measure the pad width against the interior width between the uprights. A wide pad in a narrow rack means you're threading the bench in and out on every set, and eventually you'll stop setting the spotter arms correctly because it's annoying.
The setup workflow, step by step
Step one: Read your slab before you buy a single anchor. Concrete thickness, control joints, a floor drain, and the slope toward the garage door all matter. Four inches of sound slab with no cracks is a fine anchoring surface. A cracked slab with a control joint running under where you want the rack is a plywood platform first. Also check ceiling height: bar height plus your height plus a few inches of clearance for a press or the top of the rack.
Step two: Decide bolted or flat-foot, honestly. A bolted rack on good concrete is more stable than a flat-foot rack, full stop. Flat-foot is the right answer for a rental where you're not drilling. If you bolt, use wedge anchors sized to the manufacturer's spec, drill with a hammer drill at the specified diameter, vacuum the hole out completely, and seat the anchor to the correct embedment. Over-torquing an anchor strips the threads and you lose the holding power you just paid for.
Step three: Assemble on cardboard, hand-tight first. Lay the hardware out and group it by size. Start every bolt by hand before you torque anything, because a cross-threaded bolt on a rack is a stripped hole you cannot fix. If the box ships hardware-store bolts instead of grade-8, replace them before assembly, not after.
Step four: Torque in a cross pattern, then re-torque. Cross pattern means you're pulling the frame down evenly instead of cocking it to one side. Then re-torque after the first week of training, and again after the first month. Bolts settle. Write the date on the upright with a grease pencil so you know when you last did it.
Step five: Level the base in both directions. Four-foot level across the front, then across the sides. Shim with steel or hard plastic shims, never wood, which compresses and disappears under load. A rack that's out of level rocks, and a rocking rack is a wobbling rack.
Step six: Set j-hooks and spotter arms with a purpose. J-hooks at the height where your setup puts the bar, so unracking is a straight line up and back, not a reach. Spotter arms one notch below the bottom of your squat. Not at your sticking point, where you'd dump the bar early and never learn the lift. One notch below, so they only catch what you actually failed.
Step seven: Fit the bench to the rack, not the other way around. Set the bench inside the rack, check that the pad clears both uprights, and check that the pad height lets you unrack without lifting your shoulders off the pad. Check the seat-to-back gap at your pressing angle. If the bench doesn't fit the rack, fix the bench position before you fix your technique.
Step eight: Load test before you need it. Empty bar first. Then half your working weight, then seventy percent, then eighty-five. At each step, watch the base for lift, the uprights for flex, and the j-hooks for tip. Then load your actual working weight and do one rep with a spotter or with the arms set. This is the step people skip, and it's the only step that tells you anything.
Step nine: Log it. Tube gauge if you have calipers, torque dates, and the exact weight where the wobble starts. That number is your real capacity, and you should know it before your body knows it.
Where people get this wrong
The most common mistake is bolting a cheap rack to the floor instead of buying a rack that doesn't need it. Anchors don't fix thin steel. They just make thin steel harder to move while it flexes.
The second is ignoring the spotter arm rating while trusting the rack rating. The rack holds the bar. The arms hold you. They are not the same number.
The third is skipping the re-torque. A rack that felt rock solid on day one can have four loose bolts by week three, and you'll feel it as a click in the upright on a heavy squat.
The fourth is a bench that wobbles side to side on flat and gets used anyway. If it rocks with your hand, it rocks worse with 275 lb and your shoulders on it.
What it all costs, and why the math is boring
I'm not quoting prices here because they move, and both product pages show the live number. Check current Amazon price on the rack and the bench and you'll have the real figure in ten seconds.
The math that matters is different. Whatever you pay for the rack, divide it by the number of days you'll own it. A rack is the one piece of gym equipment that has to outlive every other piece you own. Bars bend, plates chip, benches get replaced, and the rack stays bolted to the same four holes for a decade. Anchors cost a few dollars and an afternoon. A missed rep at 405 with no arms set costs considerably more than that.
Do the slab check, torque the bolts, set the arms one notch low, and load test it before you need it. That's the job. The rack is the piece that keeps you alive long enough to need a new bench.