A home gym power rack is the one purchase in your garage you should never make on vibes. Bars bend, benches wear out, plates chip, but the rack is the piece that has to catch a failed rep at 6 a.m. when nobody else is standing there. Get it wrong and the failure mode is not a refund.
I spent four years as a welder's apprentice before I moved into industrial maintenance, which is why I read welds the way most people read spec sheets. I have been powerlifting for fifteen years, I squat in a garage in Charlotte three nights a week, and I have assembled enough racks to know that the difference between one that holds and one that folds is almost never the number printed on the box.
This is the order I would do it in: site the rack, read the steel, assemble it with the right hardware, set the hooks and the safeties, then load test it in stages before you ever put your body under the bar.
Why you should trust me
I have bolted racks into concrete slabs and shimmed them on garage floors that were poured by someone who clearly hated levels. I have watched an upright bow under a load it claimed it could hold, and I have been under a bar when the safety bars were the only thing between a missed rep and my throat. That is the whole job. Not how a rack looks in a product photo, but what it does when you fail.
I do not care about powder coat. I care about tube gauge, weld penetration, hardware grade, and whether the base moves when the bar comes down hard. Those four things decide whether a rack is worth your money.
How I judged the gear in this setup
Every rack gets the same four questions. What is the actual tube thickness, read off a caliper or a real spec, not a sticker? Where are the welds, and do they penetrate the base metal or just sit on top of it looking pretty? What are the safety bars and the J-hooks rated for, as opposed to the frame? And what happens at your working weight when the bar comes down on the safeties instead of going back up?
Then there is the room. A rack in a garage on a slab is a different animal than a rack in a spare bedroom over 2x10 joists on 16 inch centers. Five hundred pounds on four feet is a point load, and point loads find the weak spot in a floor.
For the dumbbell side of the room, the questions are simpler. Do the heads survive being set down hard, does the rack hold them without tipping, and can you pull a pair out without stepping into the rack's footprint.
The two pieces below are what this setup is built around. Prices move constantly, so check the current listing rather than trusting a number from any review.
The two pieces this setup runs on
One rack, one dumbbell set, and a slab. That is a complete home gym for a lifter who squats, benches, pulls, presses, and rows. Everything else you add later is a luxury.
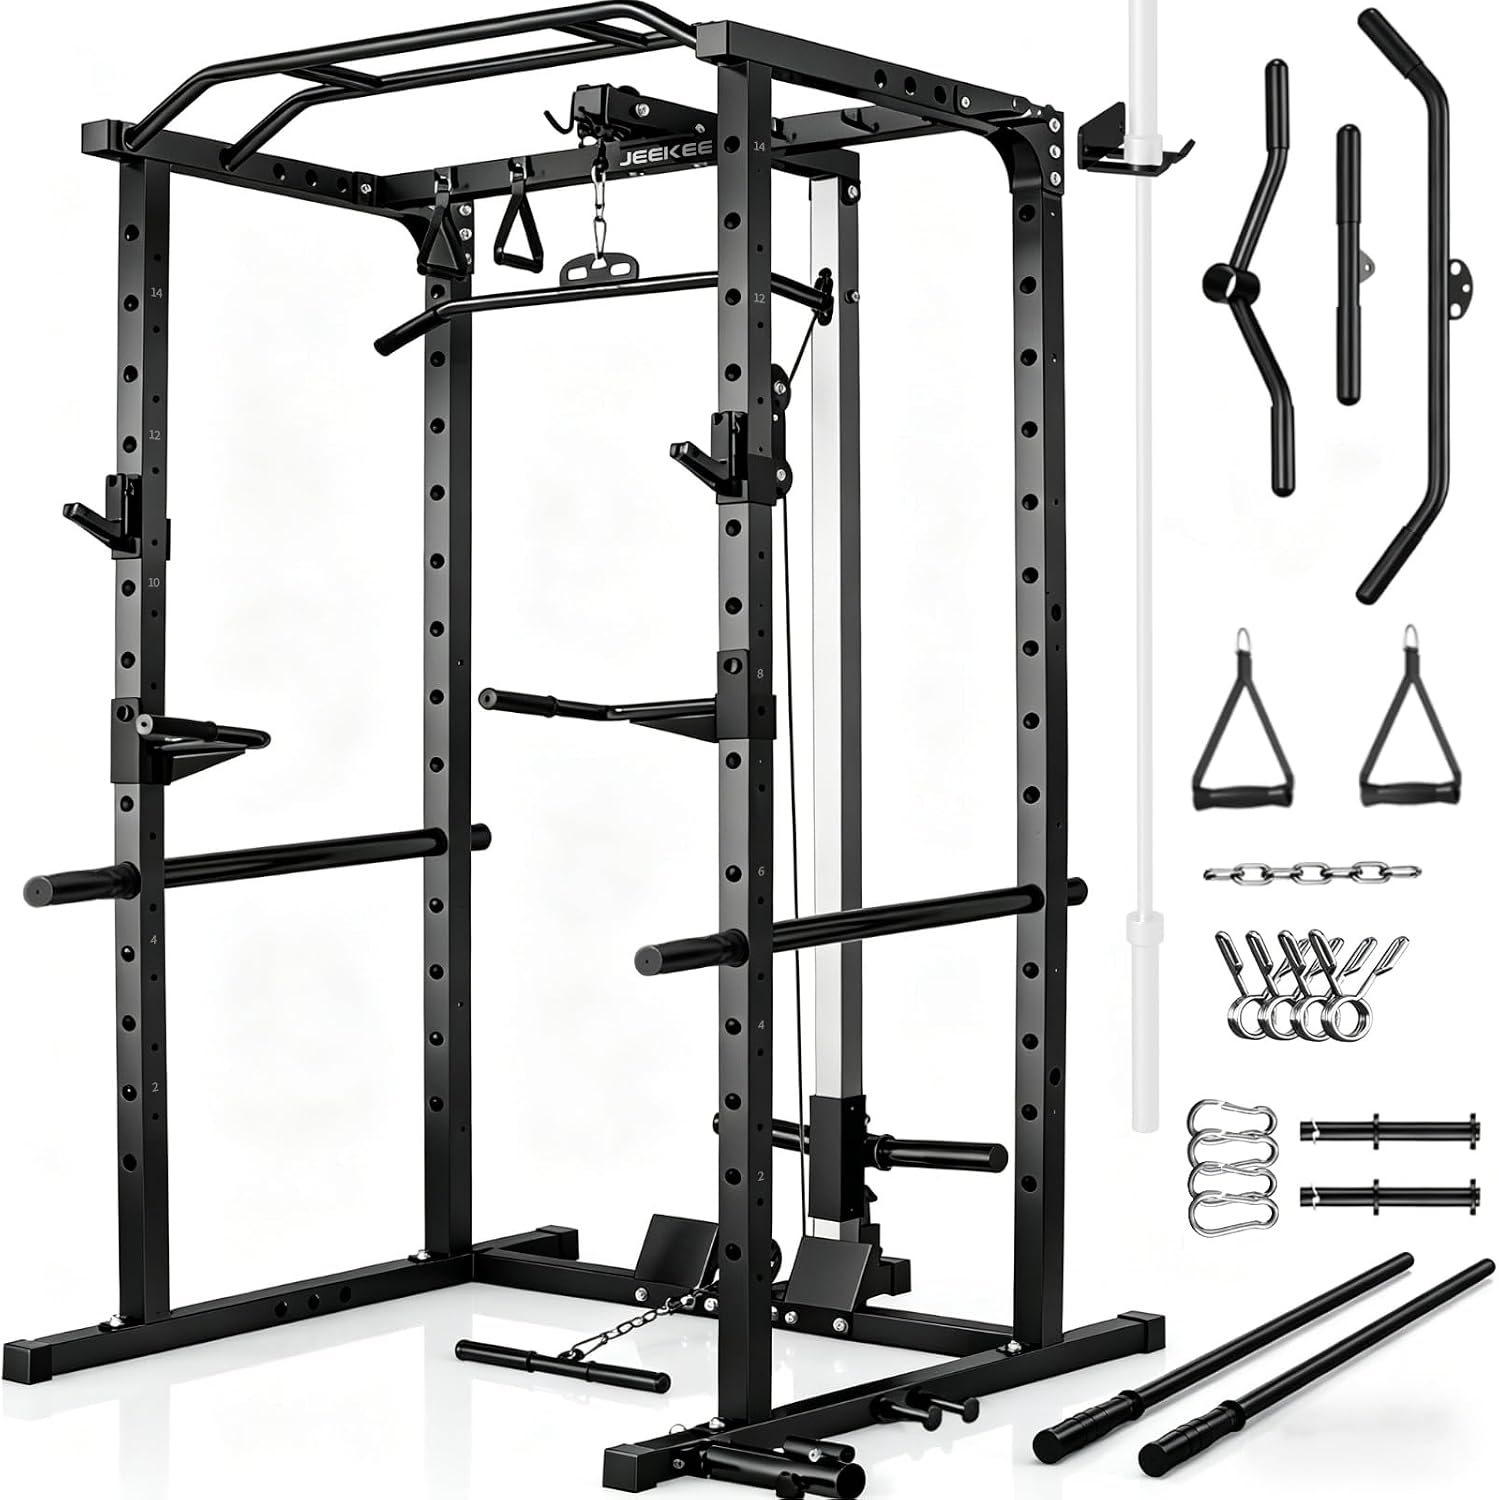
The rack: JEEKEE Power Rack with LAT Pulldown, 2000LBS Power Cage with Cable System, Multi-Function Squat Rack with J-Hooks, Safety Bars, Landmine, Pull Up Bar & Attachments for Home Gym Strength Training,Black
 Visit on Amazon →
This is a full cage rather than a half rack, and it carries a cable system, a lat pulldown, a landmine, a pull-up bar, and attachments in one footprint. That matters in a garage, because one station that covers squats, bench, pull-ups, lat work, and landmine pressing beats three separate machines fighting for the same twelve feet of concrete.
Here is what to verify the day it lands on your porch. Put calipers on an upright and compare the number to the spec, because gauge is the single most lied about number in this category. Look at the weld where each upright meets its base plate and where the crossmembers land, and look for fusion into the base metal rather than a bead resting on the surface. Check that the J-hooks are lined with something that will not chew your bar's knurl, and check the pin on each J-hook for slop. Confirm that the safety bars pin at the exact height you need for your squat depth, not just the heights that happen to be convenient.
A rack with a cable system has more moving parts than a bare cage, so add two checks: run the cable through its full range by hand before you load it, and confirm the pulleys turn without grit or binding. Cable systems fail at the pulley and the attachment point, not in the middle of the cable.
Flaws but not dealbreakers: This is a lot of steel to assemble, and a cage with a cable system and attachments is an evening of work, not an hour. Do not torque anything until every bolt is started, and get a second person to help stand the uprights. Also remember that a four digit frame rating is a frame number. Read the safety bar and J-hook ratings separately, because those are the parts that catch you.
Anyone building a single station that has to cover squats, bench, and cable work in one corner will get the most out of this.
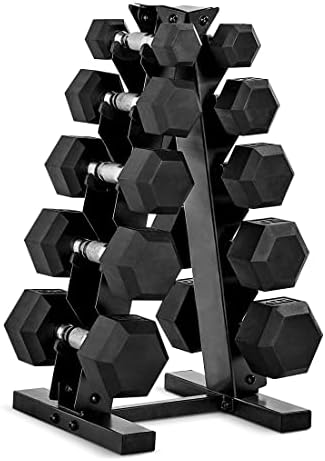
The dumbbell side: CAP Rubber Coated Dumbbell Weight Set with Vertical Rack | 100 lb, 150 lb, and 210 lb Options
 Visit on Amazon →
Rubber coated heads on a vertical rack, offered as a 100 lb, 150 lb, or 210 lb set. The coating is not cosmetic in a garage. It deadens the clang, it protects a slab better than bare iron, and it keeps you from chipping the paint on your rack when you set a pair down against an upright. The vertical rack is the other half of the value, because dumbbells in a horizontal rack eat floor space you do not have.
Pick the set total by working backward from your accessory loads, not forward from your ego. If you press dumbbells in the 50s for reps and row in the 70s, buy the set that leaves you headroom above your working weight. A set that tops out exactly at your current top set is a set you will outgrow in four months.
Flaws but not dealbreakers: Rubber is not armor. Dropping a pair from overhead still sends force straight into the concrete, and the coating will scuff and mark on a bare slab. Vertical racks are narrow at the base by design, so they want a wall behind them or a corner where nobody walks. Keep the whole station out of the rack's safety zone, because a bar that misses the safeties does not care what is in the way.
Anyone who wants dumbbells for accessory work without hunting singles on marketplace listings will be happy with this.
The actual setup: eight steps from boxes to loaded bar
Now the part you came for. None of it is hard. All of it matters.
Step one: Pick the spot and read the floor. Measure ceiling height first. A rack with a pull-up bar needs clearance for your head plus the bar plus a few inches, and a garage with an open joist ceiling is easier than a basement with a duct running through it. Then figure out what is under the feet. A four inch garage slab on grade is the easy answer. A second floor room over joists is not, and a 500 pound rack plus a 400 pound lifter is not a load to guess at.
Step two: Inspect the steel before you bolt anything together. Calipers on an upright. Eleven gauge runs about 0.12 inches, twelve gauge about 0.105, fourteen gauge about 0.075. That difference is the whole ballgame. Then look at the welds where the uprights meet the base and where the crossmembers land. You are looking for undercut, porosity, and a bead that sits on the surface with no visible fusion. A pretty weld with no penetration is a lie wearing a tuxedo.
Step three: Lay out the hardware. Grade 8 bolts, not hardware store mystery metal. Count every bolt against the parts list before you start, and sort them by length so you are not guessing halfway up an upright.
Step four: Assemble loose, then torque in a cross pattern. Start every bolt by hand before you tighten any of them. Once the frame is together, measure the diagonals with a tape. If they do not match, the rack is out of square and it will rock no matter how flat your floor is. Square it, then torque. Come back the next day and check the torque again.
Step five: Level and shim. Shim with steel or hard plastic, never wood, and shim directly under the foot rather than under the middle of a base tube. Check with a level in both directions, then recheck after your first real session, because steel settles.
Step six: Decide on anchoring, and be honest about it. If you rent and cannot drill, a flat-foot rack on a level slab can work, but you have to prove it under load. If you own the slab, wedge anchors are cheap insurance. Drill with a hammer drill, blow the dust out of the hole, drive the anchor, torque it. Never use plastic plugs in concrete, and never anchor into drywall and call it a wall mount.
Step seven: Set the J-hooks and the safeties. J-hooks go at the height where the bar clears with a small dip and no tiptoe. Safeties go one to two inches below your bottom position for squats, and just below chest level for bench, low enough that you can still arch and press, high enough that a dumped bar does not find your neck. Then test them with an empty bar. Fail a rep on purpose and let the bar land on the safeties. Do it before you need it.
Step eight: Load test in stages. Fifty percent, then seventy five, then your working weight. Watch the base for a foot lifting, watch the uprights for bow, and listen. If the rack walks across the slab or the uprights flex visibly at your working weight, you have your answer. Then re-torque every bolt after the first week and put a wrench on them once a month after that.
Setting up the dumbbell station without wrecking the room
Put the dumbbell rack against a wall or in a corner, not in the open floor where you will walk into it under a load. Keep it outside the footprint of the power rack, because a bar that misses a safety bar is a falling object with no manners.
For the floor, horse stall mats are the standard answer for a reason. They are dense, they are cheap per square foot, and they take a dropped dumbbell better than anything else you can buy at a farm store. A bare slab will chip, and a rubber mat over a bare slab will absorb some of the hit but not all of it.
Then set your spacing. You want enough room to pull a pair out of the vertical rack without turning sideways, and enough room to set them down beside you rather than on top of the rack. That is a two foot radius around the station, minimum.
What to check before you trust a rack with a failed rep
The frame rating is not the number that saves you. The safety bars are. Read the rating on the bars themselves, check the pin that holds them, and confirm they will not pop out under an impact load. A safety bar that slides out when a bar slams down on it is decoration.
Check the J-hooks too. A hook that tips when you re-rack crooked will drop a bar on your wrist, and that happens at low weight, not high weight, because that is when people get sloppy. If the hooks have any flex in the pin, replace them.
Check your hardware grade. Bolts that stretch under load are bolts that let a rack walk. And check whether you have actually tested a failed rep on your own setup, because "I am pretty sure it will catch" is not a safety plan.
What does not belong in this setup
Fourteen gauge tube with a four digit capacity sticker does not belong in your garage. Neither does a wall mount hung off drywall instead of a stud, or a bench that wobbles side to side before you even load it. Do not bolt a cheap rack to the floor to make up for thin steel, because you are just anchoring a weak frame to a good slab. And do not buy a rack for a squat you do not have while skipping the safety bars that would catch the squat you do have.
What this all costs over the life of the rack
Prices on both of these change, so check the current listing before you do the math. The way I think about the money is cost per year, not cost at checkout.
The rack is the piece that outlives everything else. You will replace a bar, a bench, and a set of plates before you replace a good cage, and if you buy the thin one you will replace it the first time it moves under a working weight. Same logic on the dumbbells. A set with headroom above your current top set is a one time purchase, and a set that tops out at your working weight is a purchase you make twice.
That is the whole calculation. Steel you can trust costs less per year than steel you have to watch.
Do the eight steps once, torque the bolts, set the safeties where they actually catch, and then stop thinking about the rack. That is the point of it. Your rack should be the one thing in the garage you never have to think about again while you are under the bar.