Most home gyms get built backward. People buy the rack, drag it into the garage, bolt it to whatever slab is under it, and then find out the ceiling is two inches too low for an overhead press. A home gym power rack setup should run in the opposite order: measure the room, decide the anchor, then buy steel that fits what you measured.
I have done this in a Charlotte garage three times now, once with a rack that bowed at 405 and once with a wall mount that pulled its top bolts out of a stud. Both of those mistakes were avoidable in about 20 minutes with a tape measure and a stud finder.
This is the order I would run in 2026, using one rack with cable work built in and one adjustable dumbbell set that covers everything the rack cannot.
Why you should trust me
I am Andre. Fifteen years under a bar, a raw 500 lb squat in a Charlotte garage, and four years as a welder's apprentice before I moved into industrial maintenance. That apprenticeship is why I read a rack differently than most reviewers. I look at penetration before I look at powder coat. I have assembled and loaded nine racks in six years, and I keep a grease-pencil logbook of every one: tube gauge, weld penetration, bolt torque, and the exact weight where the wobble starts.
I have also failed a squat at 495 with nobody in the garage but me. The safety bars caught it. That is the only endorsement of a rack that means anything.
How I picked and how I tested
Every rack has to clear the same list before I would hang my face under it:
- Gauge, checked with calipers and not read off a sticker. 11-gauge is the standard. 14-gauge with a big number on the box is a legal document, not a fact.
- Weld penetration at the corners, where the load actually goes. A pretty bead with no penetration is a lie wearing a tuxedo.
- Hardware grade. Grade 8 bolts, or walk away.
- What happens at the rated capacity: does it hold, bow, or walk?
- Whether the safety system, j-hooks and spotter arms, is rated at or above what I squat.
For dumbbells I check three things: whether the range covers warmups through working sets, how much floor the set eats, and whether the change mechanism survives being set down hard a thousand times.
The two pieces below are the pair I would build a garage around right now. One handles the bar work, the cable work, and the lat work in a single footprint. The other covers every gap the rack leaves open.
The rack that carries the build
A rack is the one piece of equipment in your garage that has to outlive everything else you own. Buy it once, and buy the version that does the most jobs in the space you actually have.
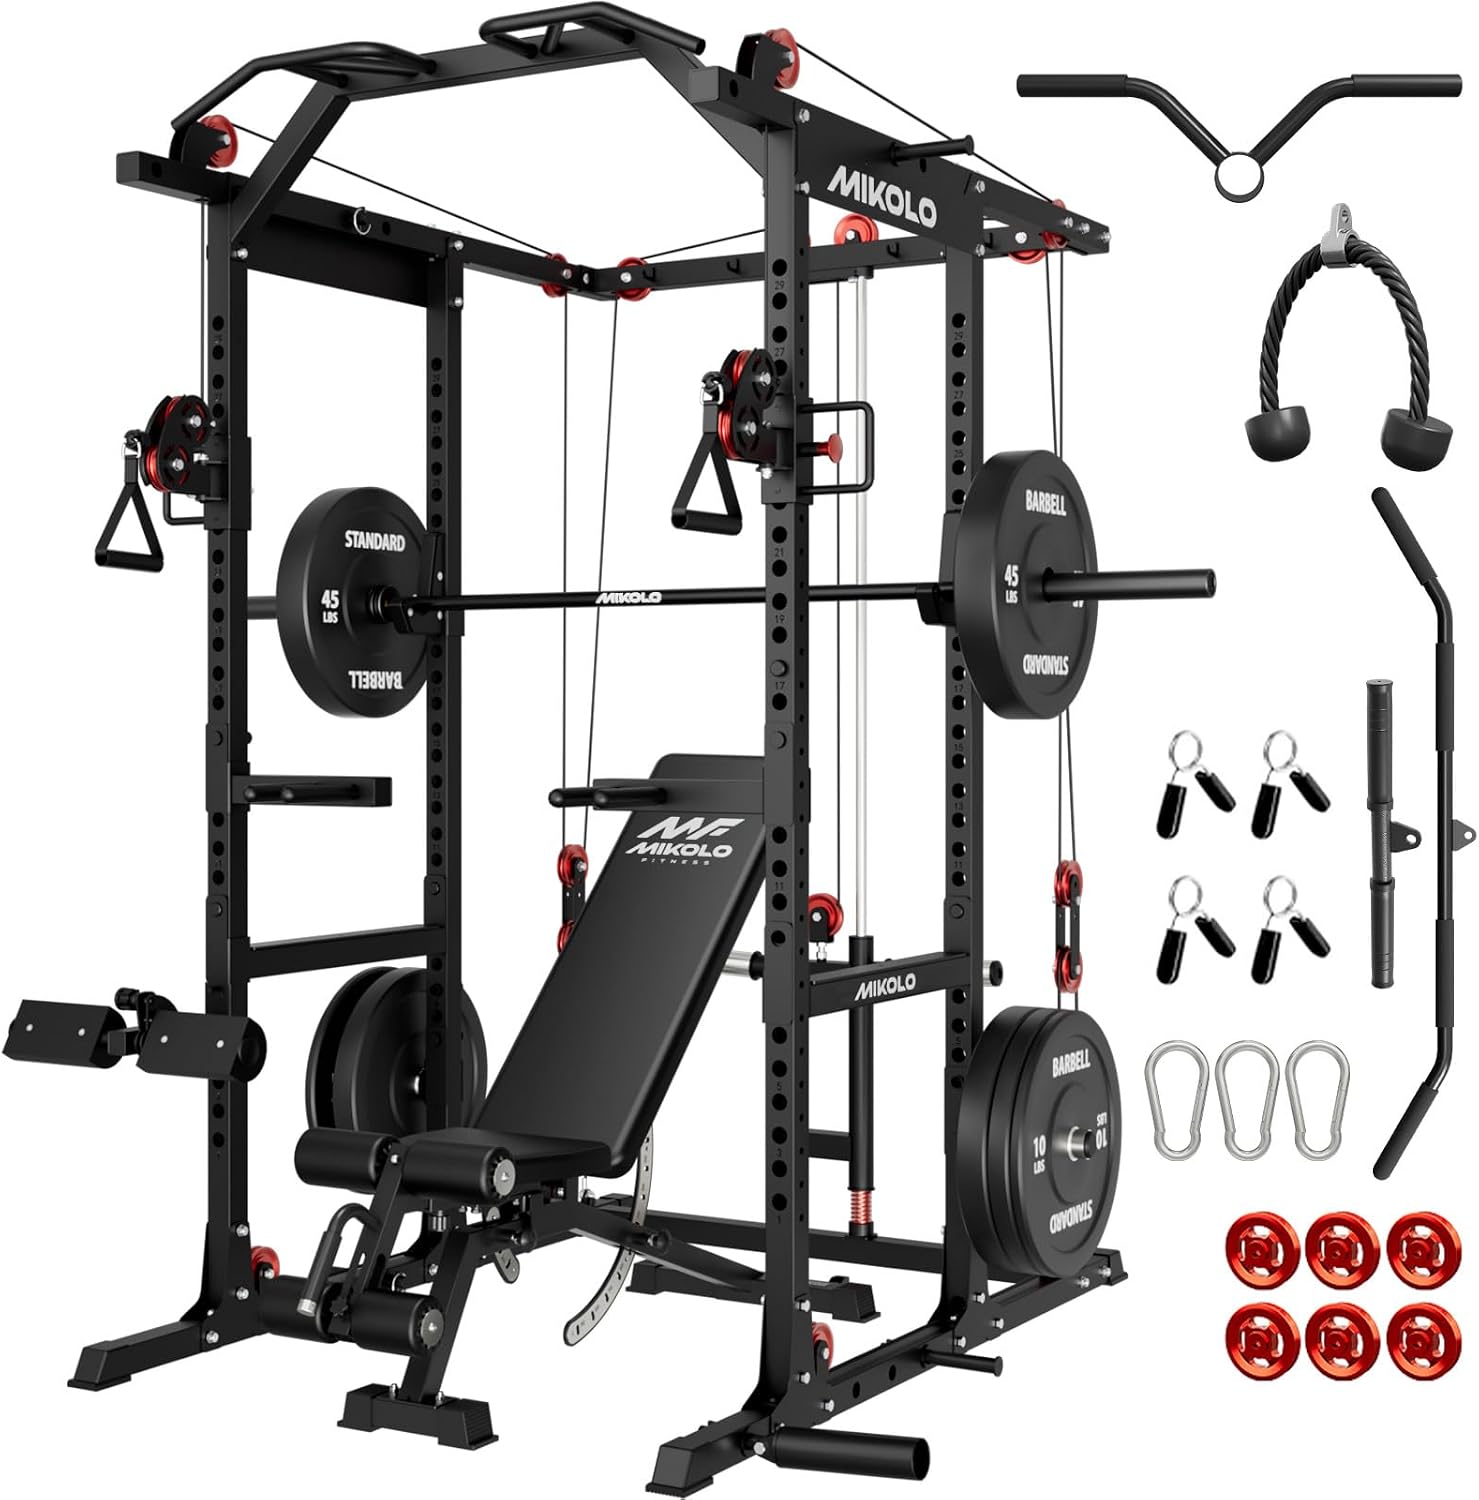
Our pick: Mikolo K6 2.0 Power Cage, Power Rack with Cable Crossover System, 2000LBS Squat Rack with LAT Pull Down System, Functional Trainer with Aluminum Pulley System for Home Gym
 Visit on Amazon →
This is the rack I point people toward when the garage is one bay and the wish list is three machines long. It is a power cage, a cable crossover, and a lat pulldown in one frame, which means you are not giving up floor space three separate times. The pulley system is aluminum rather than the plastic sheaves you find on cheap functional trainers, and aluminum is the difference between a cable that runs smooth for five years and one that shrieks by month eight.
The 2,000 lb figure in the name is a claim, and claims are where I get careful. Before you load anything heavy, put calipers on the uprights and confirm the gauge yourself. Check the hardware that shipped in the box. If it is grade 8, torque it and move on. If it is hardware store stuff, replace it before you rack a loaded bar.
Flaws but not dealbreakers: A cage with a cable system has more moving parts than a plain rack, so it needs attention: cable tension, pulley bolts, guide rods. If you never plan to touch a cable, you are paying for steel you will not use, and a plain rack is the smarter buy. Bolt-together also means you own the torque spec, and you should re-check it after the first month of real loading.
Anyone with a single garage bay and a long list of movements to cover gets the most out of this.
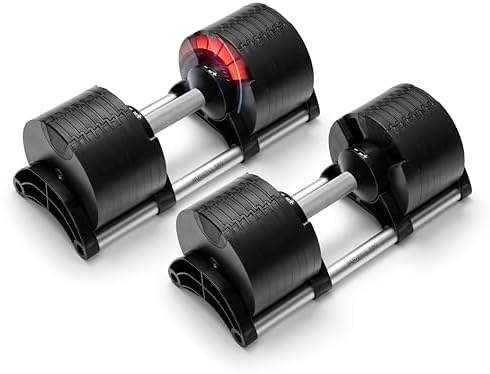
The pairing: Nuobell 580 Adjustable Dumbbells, 5-80 lb, Set of 2 Free Weights
 Visit on Amazon →
A rack covers squats, presses, and pulls. It does not cover lunges, split squats, single-arm rows, or the incline work that builds an upper chest. A full dumbbell wall from 5 to 80 lb in pairs would eat an entire side of the garage. This set does the same job in the footprint of two shoe boxes, because each dumbbell runs from 5 to 80 lb as a single unit.
Eighty pounds per hand is the honest ceiling here, and you should know that before you buy. For most home lifters it is enough for pressing, rowing, and arm work for years. If you are already pressing 100 lb dumbbells, this is a supplement, not a replacement.
Flaws but not dealbreakers: Adjustable dumbbells are not meant to be dropped. The change mechanism is the whole point of the product, and a hard drop on a garage slab is how you kill it. Set them down under control. Keep them out of the walking lane between the rack and the door, because a dumbbell you trip over is a dumbbell you stop using.
Anyone who wants a full dumbbell wall without the wall should start here.
The actual setup, step by step
This is the part people skip, and it is the part that keeps your teeth.
Step one: measure the ceiling first. Stand where the rack goes and reach overhead like you are locking out a press. Add the bar and your tallest plate, then add three inches of clearance. Most home racks need 90 to 96 inches to press inside the cage. If your ceiling is lower, you press outside the rack and treat the safeties as squat and bench equipment only.
Step two: read the floor. A garage slab is not flat or level. It slopes toward the door for drainage, which means a rack that sits square at the back of the bay can be leaning forward by the time you reach the front uprights. Put a level on the floor and find out. If the slope is real, shim the feet with steel plate, not wood and not rubber.
Step three: decide the anchor before you assemble anything. This is the fork in the road. A flat-foot rack with a wide base and real 11-gauge steel can stand on its own. A lighter bolt-together rack on a smooth slab will walk when you re-rack heavy, and walking is the wobble that hurts people. If you rent, a flat-foot design plus rubber under the feet is the honest answer. If you own the slab, drill and anchor.
Step four: inventory the hardware. Lay every bolt out on a towel and count it against the manual before you start. Racks ship missing pieces more often than people admit, and finding out at 90% assembly costs you a week. Check the grade markings on the bolt heads while you are there.
Step five: assemble the uprights flat on the floor, then stand it up. Cross-brace first, then torque in a cross pattern the way you would torque a cylinder head: snug everything, then run final torque in a star sequence. This is the single biggest difference between a rack that feels solid and a rack that creaks.
Step six: route the cables and check the pulleys. Run the cable by hand through every sheave before you load it, then confirm the cable sits in the groove and not against the flange. A cable that rubs the edge of a pulley will fray, and a frayed cable is a loaded failure waiting to happen. Re-check tension after the first week and again after the first month.
Step seven: set j-hooks and safeties to your real working height. For squats, the safety bars sit one notch below the bottom of your rep, so a failed rep lands on the bars and not on your neck. For bench, just below your chest at the bottom. If the spotter arms are rated below what you squat, they are decoration.
Step eight: load test in stages. Empty bar first. Then half your working weight. Then 80%. Then your top set, with the safeties set. Watch the base at every step: does it lift, slide, or bow? Listen for creaks at the joints. A rack that is quiet at 315 and groaning at 405 is telling you something.
Step nine: place the dumbbells where you actually use them. Put the adjustable set at the end of the rack, not against the wall behind it, so you can grab a pair and step straight into a bench or a split squat. Leave a walking lane at least the width of your body between the rack and anything else. A crowded gym is a dangerous gym, and a garage is no different.
Why I skipped the alternatives
Flat-foot racks are the right answer for renters, and the good ones hold. The problem is that "flat-foot" gets used to sell light tube with a wide stance, and light tube with a wide stance still walks.
Wall-mounted racks save floor space and cost less, and I have used one for years. They also hang your face from four bolts. If you do not hit a stud dead center, or if the anchor spec does not match the load, you are trusting drywall with your spine. If you go that route, check the stud layout and the anchor rating before the rack arrives.
Fourteen-gauge racks with a big capacity sticker stay in the box. So do racks that ship with hardware store bolts. Neither is a bargain at any price, because you will replace both.
What this all costs
There are two real purchases here: the rack and the dumbbells. Everything else, flooring, collars, extra j-hooks, is small money by comparison. Check current Amazon price on both before you commit, because both of these move.
The math that matters is not the sticker. It is the monthly gym bill you stop paying, and the fact that a rack built properly does not need replacing in five years. Spread across a decade of three sessions a week, the cost per session drops to coffee money. The rack is the one thing in the garage that has to outlive the rest of it, so it is the one thing worth buying right the first time.
Measure the ceiling. Read the floor. Decide the anchor. Then buy the steel that fits what you measured, torque it in sequence, and load it in stages.
That is the job. The rack is supposed to catch you. Build it so it can.