Most people assemble a home gym rack and bench setup backwards. The rack arrives, it gets dragged onto the slab, a bar goes on the hooks, and only then does the owner notice the floor slopes toward the garage door, the bench pad sits too low under the j-hooks, and the whole thing walks an inch sideways every time they rack a heavy squat.
I built my garage gym in Charlotte bolt by bolt, and I have put together, loaded, and deliberately abused nine racks in the last six years. One bowed at 405. One wall-mount pulled its top bolts out of a stud because the anchor landed in drywall instead of lumber. The order you do this in matters more than the brand on the box. Get the floor, the layout, and the bolt torque right and a modest setup will hold a serious squat. Get them wrong and a rack with a big capacity sticker will still fold on you.
Here is the order I do it in.
Why you should trust me
I spent four years as a welder's apprentice before I moved into industrial maintenance, which is a long way of saying I read welds before I read spec sheets. I have squatted 500 lb raw in a garage and pulled 605, and I have failed a squat at 495 with nothing between me and the slab but a pair of safety bars that did their job. I keep a grease-pencil logbook on every rack I assemble: tube gauge measured with calipers, weld penetration at the upright-to-base joint, bolt torque after the first week, and the exact weight where the wobble starts. When I tell you to check the hardware bag before you trust a rack, it is because I have watched a hardware-store bolt stretch at 365 lb.
A rack that wobbles at 315 will hurt you at 405. There is no negotiation on that.
Measure three things before you assemble anything
Ceiling height. Rack height plus your standing press. Measure at the lowest point in the garage, not the highest, because door tracks and light fixtures hang lower than the joists. If you cannot press inside the rack, you will end up pressing outside it with no safeties, which is the exact situation the rack was supposed to prevent.
The floor. Garage slabs drain toward the door, so they slope. A quarter inch per foot across an eight-foot rack is two inches of drop end to end. A rack sitting on that slope rocks when you re-rack a bar, and rocking is what turns a failed rep into an injury. Level it with rubber mats and shims, or build a plywood platform and level that.
Slab thickness and anchor plan. If you are bolting down, know what you are drilling into. A four-inch slab and a wedge anchor is a different conversation than a six-inch pour with rebar. If you are not bolting, you are buying stability from the rack's own base, which means the base needs to be wide and the steel needs to be thick.
The two pieces worth putting in the room
Everything below is about what holds the weight and what sits on the floor around it. A rack and a bench first, then the small stuff.
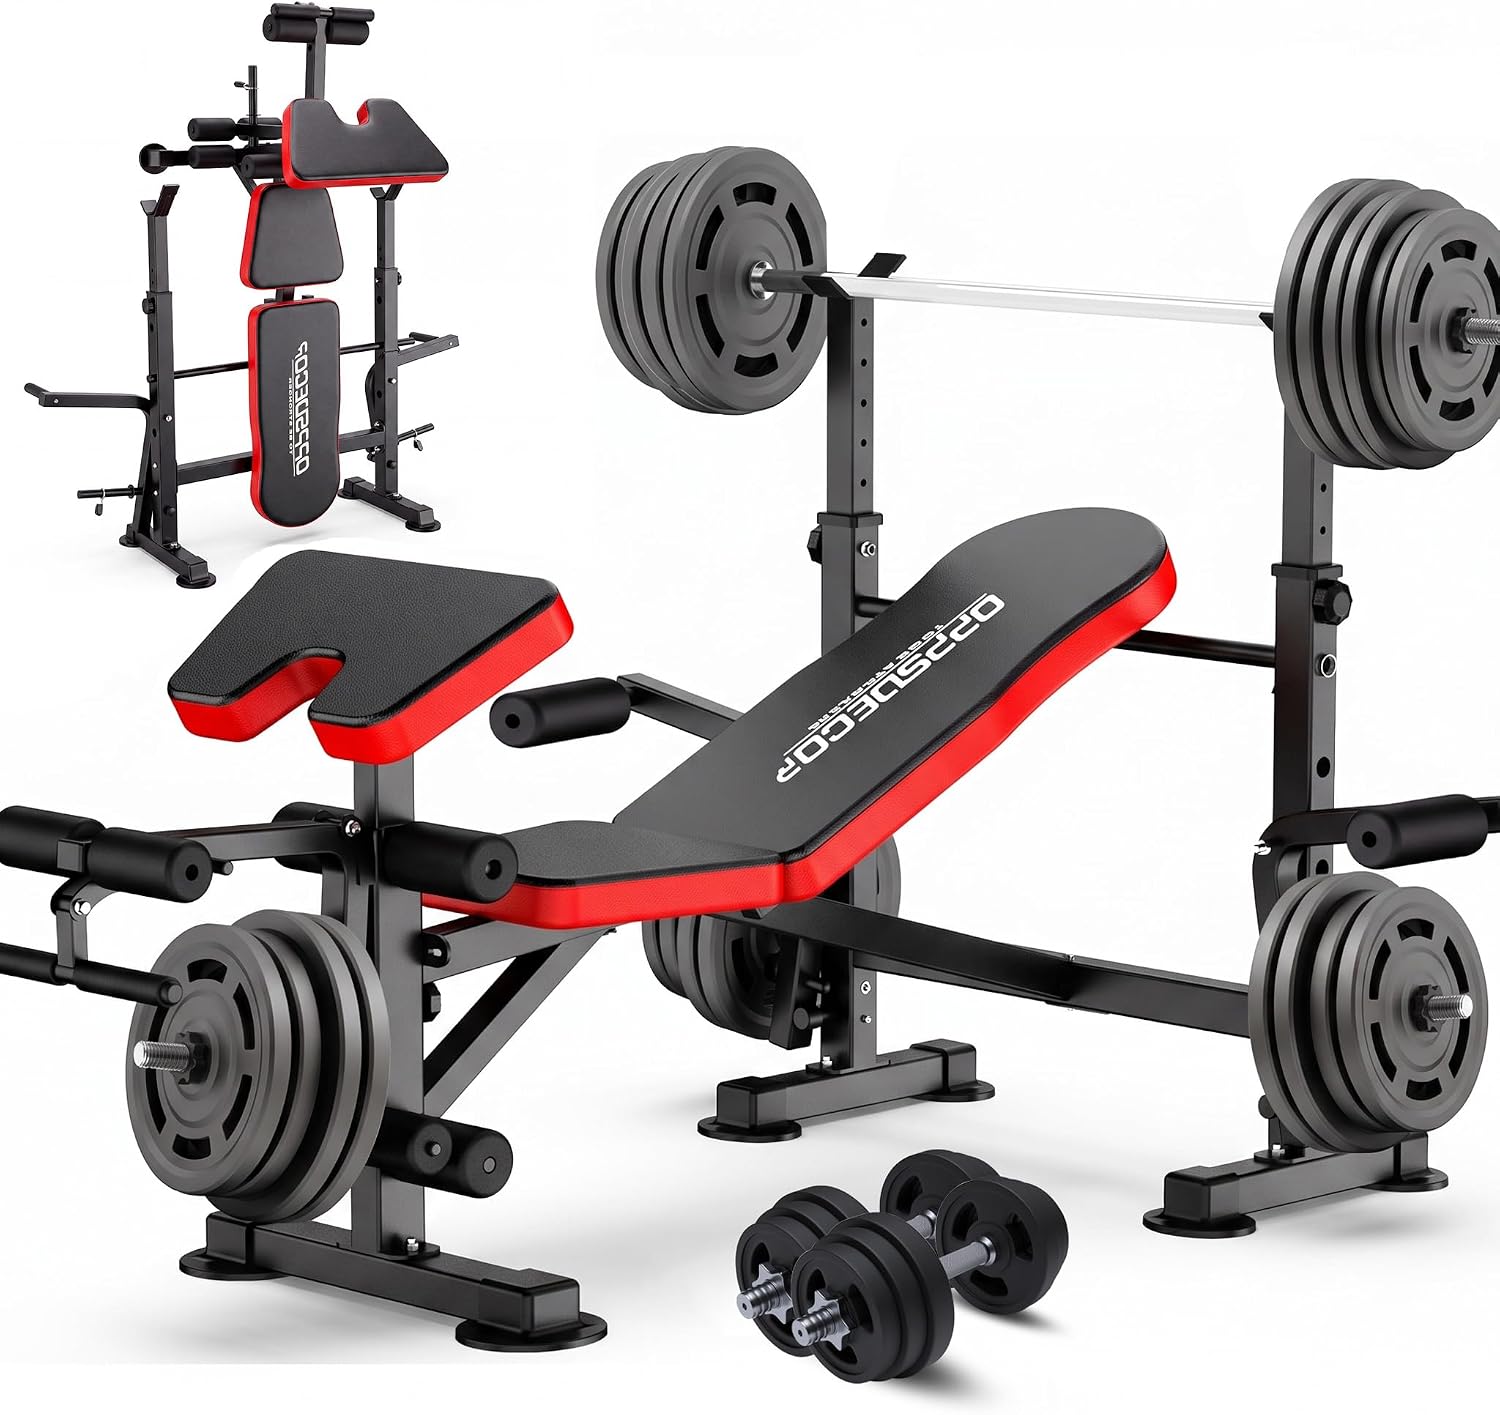
The rack and bench combo: OPPSDECOR Weight Bench Set with Squat Rack, 900LBS Adjustable for Home Gym
 Visit on Amazon →
A matched rack and adjustable bench is exactly what a first garage gym needs, because the pad height, the j-hook height, and the frame width were designed as one unit instead of two guesses. That saves you the most common rookie mistake, which is buying a bench that sits too tall or too low relative to the hooks so you are unracking a bar at eye level.
The capacity figure in the name is a claim, not a fact. Treat it as the ceiling of what the maker is willing to stand behind, then verify it yourself. Put calipers on the upright tube and compare it to the sticker. Look at the weld where each upright meets the base plate and ask whether the bead penetrates into the parent metal or just sits on top of it like frosting. Dump the hardware bag onto a rag and check the bolt heads for grade markings. If they are unmarked, spend a few dollars at the hardware store on grade-8 replacements before you load a single plate. It is the cheapest insurance in the whole build.
Flaws but not dealbreakers: combos trade some rigidity for price, and that shows up as flex at heavy singles rather than as a failure. Plan on re-checking every bolt after the first week, after the first month, and after your first near-max attempt. If the frame moves at your working weight, stop and re-torque before you add another plate.
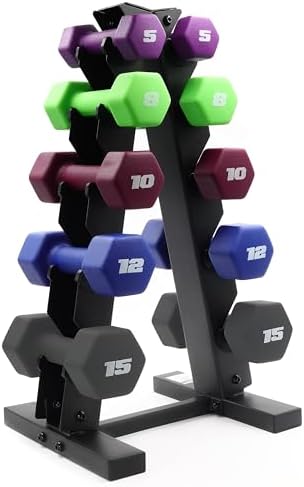
The dumbbell half of the room: CAP Barbell Neoprene Dumbbell Weights Pairs & Sets | Color Series
 Visit on Amazon →
Every rack setup needs dumbbells, and not for the reason most people think. They are for warm-ups, for unilateral work when your back is cooked, and for the days you want to press or row without pulling a bar out of the hooks. In a garage, the neoprene coating is the real selling point: it does not chip the slab when you set a pair down hard, and it does not scrape the powder coat off your rack uprights when you miss the shelf. The color series also makes pairs obvious at a glance, which matters more than it sounds when you are mid-set and grabbing by feel.
These are fixed weights, so buy the pairs you actually use and add as you get stronger. A pair you never touch is just floor space.
Flaws but not dealbreakers: neoprene holds chalk dust and picks up garage grime, so wipe them down with a damp rag every few weeks. And a fixed dumbbell is a fixed dumbbell. If you need a 15 lb jump and only own 10s and 25s, plan the purchase before the plateau, not after.
How to assemble and set up the rack, step by step
Step one: Prep the floor. Sweep the slab, then lay your mats or build your platform. Do this before the rack comes out of the box, because dragging a half-assembled rack across a slab is how you scratch powder coat and lose hardware.
Step two: Lay out the footprint. Mark the four corners in chalk. Stand in the rack with a bar on your back and check that you have room to fail forward and room behind you to load plates. Adjust before you commit.
Step three: Make the anchor decision. If the rack is going to walk, bolt it. If it is not going to walk and the base is wide, leave it. What you should not do is bolt a cheap rack to the floor to fix a problem that a better base would have solved, because anchors are permanent and slabs are not forgiving.
Step four: Assemble the uprights lying down. Bolt the crossmembers and base together on the floor, then tip the frame up with a second person. This is the single most common place people cross-thread hardware, because they try to assemble vertically with the frame fighting them.
Step five: Torque everything, then torque it again. Snug the hardware in a cross pattern, then come back around and tighten it properly. Mark each bolt head with a paint pen so you can see movement later. A bolt that has rotated is a bolt that has loosened, and a loosened bolt is a rack telling you it is about to move.
Step six: Set the j-hooks. Stand under the bar position. The hooks should sit so the bar is just below your shoulder line in the squat stance, and low enough that you can unrack a bench press with locked arms instead of a half press.
Step seven: Set the safeties. Spotter arms or safety bars go one hole below your bottom position, so the bar touches them before your body does. Test it with an empty bar, then with a light load, and physically check that the bar lands on steel and not on the gap.
Step eight: Walk the rack before you load it. Grab the frame at chest height and push it side to side and front to back. Any movement here is a hardware problem or a floor problem, and both are fixable before you are under a heavy bar.
How to set up the bench so it holds
The bench is where people cheap out, and it is the second most dangerous piece in the room after the rack. Set it up like it matters.
Check the incline first, because that is where benches actually fail. Lock the back pad at 30 degrees and push down on the top edge with your body weight. If the pin mechanism has any play, or if the pad shifts on the frame, that is the failure point you will find at 275 lb. Check flat bench for side-to-side rock by sitting on the edge and shifting your hips. A bench that rocks laterally on flat bench is not stable enough for dumbbell work, let alone barbell work. Finally, check the gap between the back pad and the seat. If it pinches you at the bottom of a press, you will start cutting depth, and cutting depth is how a bench press turns into a shoulder problem.
The bench in a matched combo is built to the rack's geometry, so set it once, mark the pin positions with tape, and stop fiddling with it every session.
Test the whole setup before you trust it with a real squat
This is the part nobody films and everybody should do. Load the bar empty and walk the rack. Then 50 percent of your working weight. Then 75. Then 90. At each step, watch three things: does the base lift off the slab, do the uprights flex visibly, and does the bench rock when you sit on it under load.
If it moves at 315, it moves worse at 405. The correct response is not to add weight and see. The correct response is to re-torque the hardware, check the floor for slope, and if it still moves, accept that you bought a rack for a weight class below where you are trying to live.
Re-check torque after your first genuinely heavy session. Steel settles, mats compress, and bolts that were tight on assembly day are often not tight a week later.
Maintenance, so the setup outlives everything else in the garage
For the first three months, go around the rack once a month with a wrench and a paint pen. After that, quarterly is enough. While you are down there, look for cracks or paint flaking at the weld toes, because paint flaking at a weld is often the first visible sign of a joint working. Wipe the j-hook threads and hit them with a light oil so they do not gall. Check floor anchors for rust and re-tighten if the rack has shifted. Wipe the neoprene dumbbells so chalk dust does not turn into a permanent gray film.
The rack is the one piece of gym equipment that has to outlive every other piece you own. Maintain it like that.
What this costs and what it does not
The matched rack and bench combo is the biggest single line item in the room. The dumbbell pairs are the second, and they are the line item that grows slowly over years instead of all at once. Flooring, a bar, and plates are separate purchases and separate decisions, and none of them are covered by a capacity sticker.
What this setup does not do is turn a light-duty rack into a heavy-duty one. If you are squatting north of 400 lb on a regular basis, the money you save on the combo is money you will eventually spend on a thicker frame. For everyone else, the combo plus a couple of dumbbell pairs plus a leveled floor is a complete garage gym that will hold for years, provided you torque it, test it, and re-check it.
That is the job. Do it in this order and the rack will still be standing when everything else in the room has been replaced.